ANDI don’t know about you guys, but this 80+ degree weather is so NOT throwing off my fall! I won’t let it! It’s so pretty to watch the leaves finally start to change colors and fall off the trees in our neighborhood. I’m totally still that little kid that looks for crunchy leave piles to jump on. Some things never change, right? 🙂
With the falling leaves, it really got me in the spirit to do yet another fall-themed project. In an effort to stick with non-diabolical, alternate Halloween festivities and decor, I wanted to find a new way to decorate pumpkins. I also just don’t have the energy to be bothered with all the super messy cutting and scooping pulp that comes with carving pumpkins (because, to me, it’s only worth the effort for organic pumpkin puree, but I’ve even been buying that lately!)
I was inspired by this old Free People Blog post that included decoupage pumpkins and thought I’d give it a try. It’s really easy and doesn’t require a ton of materials or skill (thankfully). To mix it up a little, I thought gold accents would be pretty (especially after seeing these from A Pumpkin and A Princess blog) so I snagged some gold spray paint and glitter while I was plodding around Michaels and figured I’d decorate a few pumpkins with that, too. Oh and pinecones. I scooped some up outside my mom’s house and have been waiting to find something fun and pretty to do with them. Again, super easy and so pretty! Here’s how I did it:
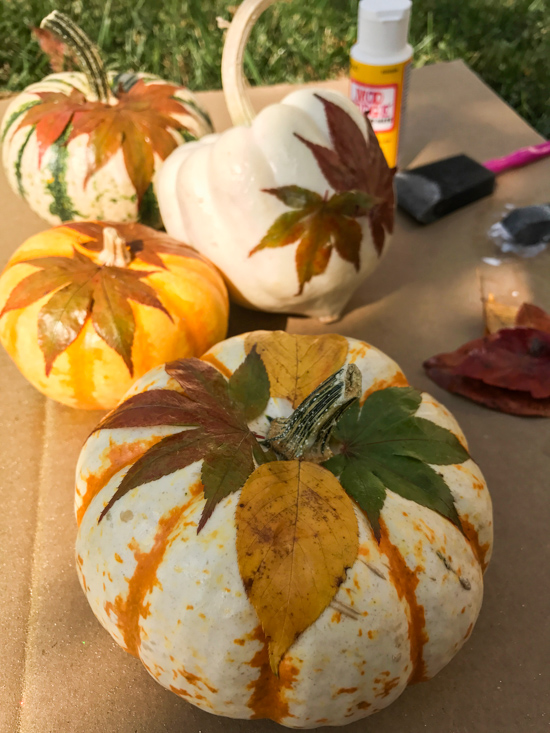
Leaf Decoupage Pumpkins
What you’ll need:
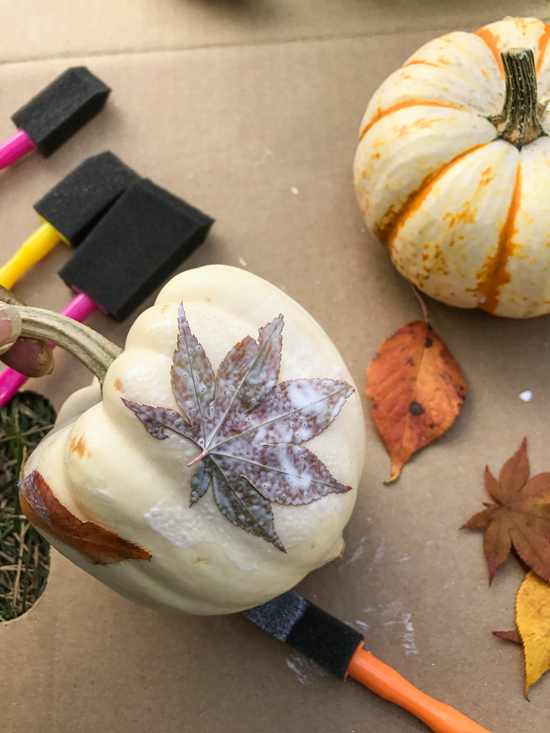
- Mod Podge – matte finish
- Paint or foam brushes
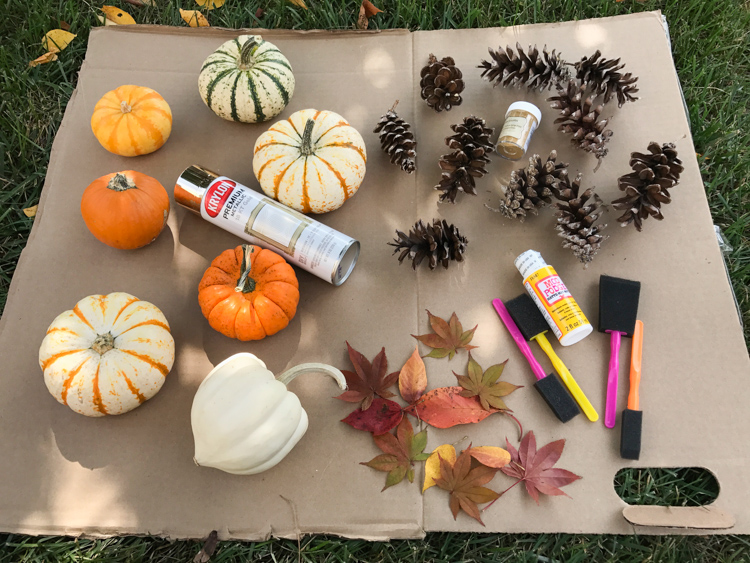
- Pumpkins (I used real ones because they were prettier – and cheaper – than the craft ones at the store and the size I wanted)
- Leaves
How to do it:
Go for a walk in your neighborhood and pick up any pretty leaves you find. Look for a variety of sizes, shapes and colors. Make sure the leaves you choose are still soft and pliable; the crunchy ones won’t adhere to your pumpkins!
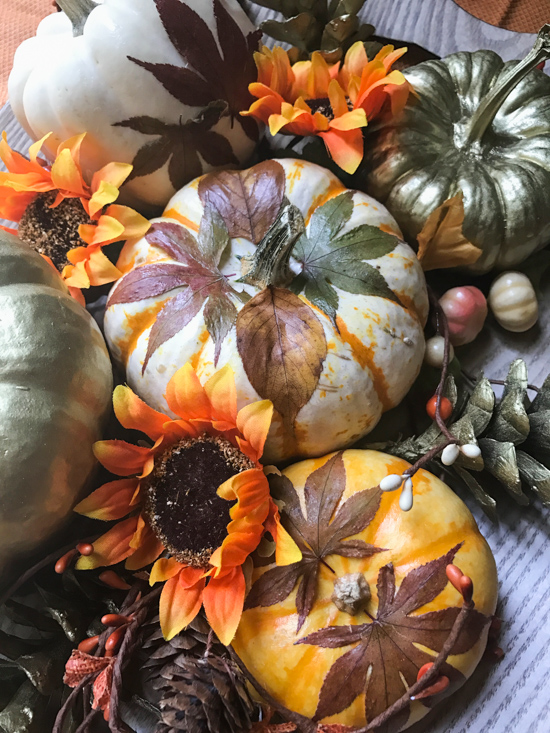
Set up your workspace however you prefer. I literally sat outside in the front yard under a tree with a big rectangle of cardboard (mostly for the spray painting, but it works for this, too). Get some Mod Podge on your brush (just pour a small amount onto a swatch of cardboard, a paper plate, whatever and dip your brush in) and brush some onto the pumpkin where you want to place the leaf. Then brush the bottom side of the leave and stick it onto the pumpkin. Dab some more Mod Podge in a thin coat on the top of the leaf to lay down the edges as smoothly as possible. Press down on the leaves to help them stick. This may be easier or harder depending on the contours of your pumpkin, so just be patient. Continue until you’ve applied all the leaves you want on your pumpkins in whatever array makes your heart happy. When you’re done, let the pumpkins dry for several hours, or overnight. The Mod Podge will dry clear without shine.
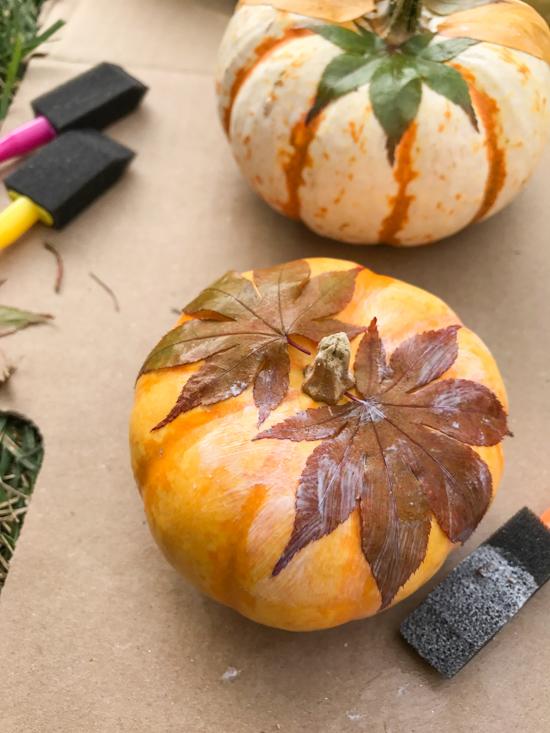
I went with a little bit of a minimalist approach because I didn’t want to totally cover up the pretty, natural colors and patterns of my pumpkins, but you can go for full coverage if you want! To do multiple layers, let the Mod Podge dry a bit between layers so your leaves stay in place and don’t slide everywhere as you go. You could also do this with scrapbook paper instead of leaves if you wanted to!
Gold Metallic Pumpkins and Pine Cones

What you’ll need:
- Gold spray paint (I used Krylon 18k gold metallic spray paint)
- Glitter, if desired
- Pumpkins and pine cones of different shapes and sizes
- Cardboard, newspaper, or something else to protect your work surface
- Disposable gloves (optional, but highly recommended. If you get any on your hands, a little soap, warm water and rubbing alcohol will get it off quick.)
How to do it:
Literally just spray. Ha! It is that easy, but there are a few things to keep in mind:
- You’ll want to do this outside, if at all possible. It can get a little messy and smelly. I dropped my cardboard in the front yard (to avoid turning my MIL’s grass gold) and sprayed on that. Just be sure to keep the direction of the wind in mind… you don’t want all the spray paint blowing back in your face!
- Shake the canister really well (before and intermittently as you go) and spray from about 6 inches away or so to avoid the spray paint puddling on the surface. That way you’ll get a nice, even coat.
- For the pinecones, I recommend holding them by the stem and turning slowly as you spray. Then hold them upside down to spray underneath so they’re completely coated. Then sit them on the cardboard and spray the stem last.
- For the pumpkins, I suggest spraying from the bottom up. If you spray the top first, the paint on the stem will smudge when you try to rotate them and you’ll end up redoing it anyway. So pick the pumpkin up, spray the bottom, then sit it down and spray around the sides and finish with the very top.
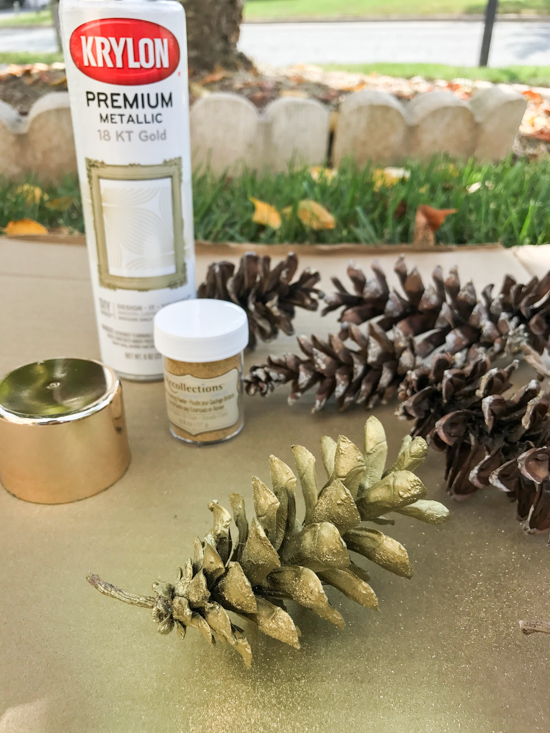
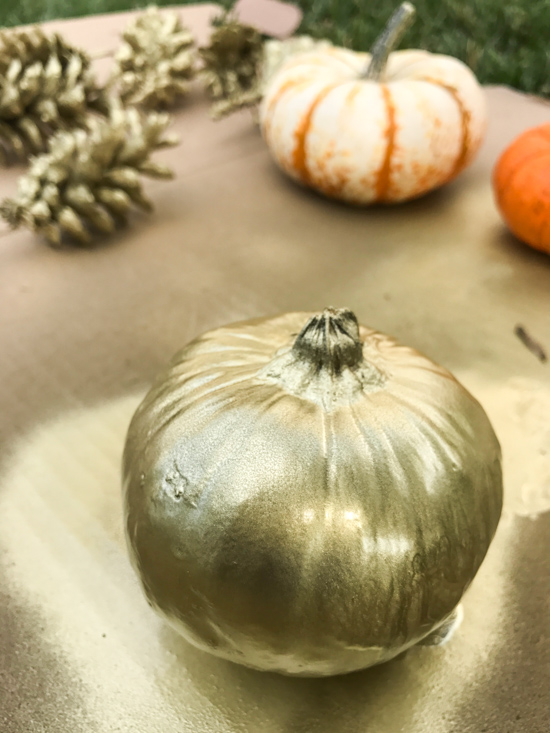
The spray paint will dry fairly quickly, especially if you’re doing this outside on a warmer day. This is helpful if you need to move your pine cones or pumpkins to a different spot to dry completely. You should allow the spray paint to dry thoroughly for an hour or two. This extra “cure time” will also help the fumes to dissipate. Very important before putting these on your table or around your house for decoration!
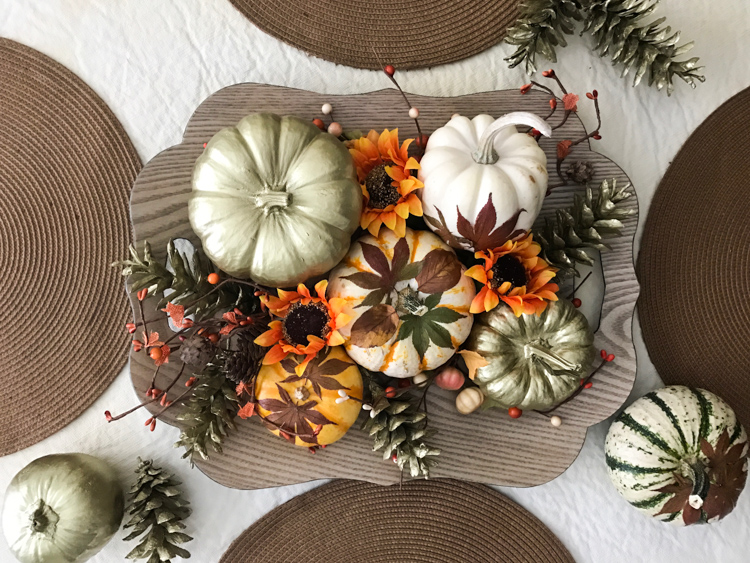
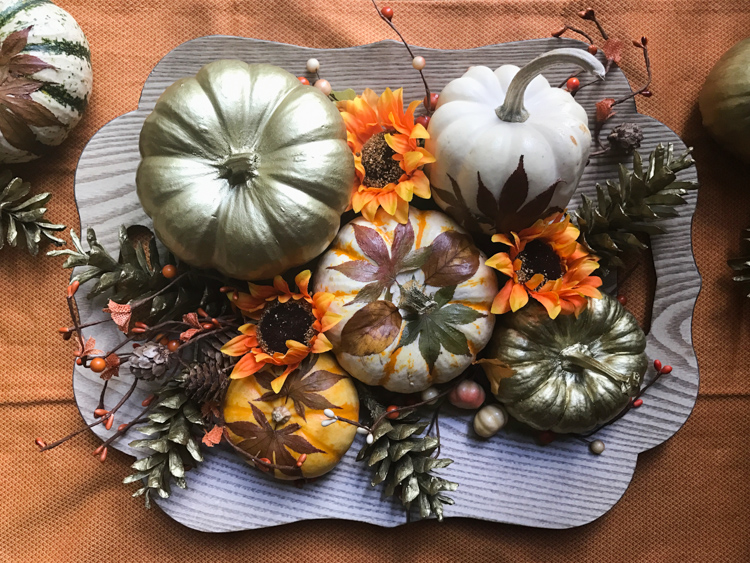
I left everything out on the porch, on the same cardboard I sprayed on, until bedtime when I brought it all inside and set the cardboard near an open window for the rest of the night. By the next day, they were ready to go! I arranged everything on a cute little platter I found to make this centerpiece, and filled it in with some leftover stems from the fall wreath I made. Now if only our house were ready and we had a pretty dining room table to put this on! 😉